First of all - let me say...... HAPPY NEW YEAR!!! I wish you all the best in 2013!.
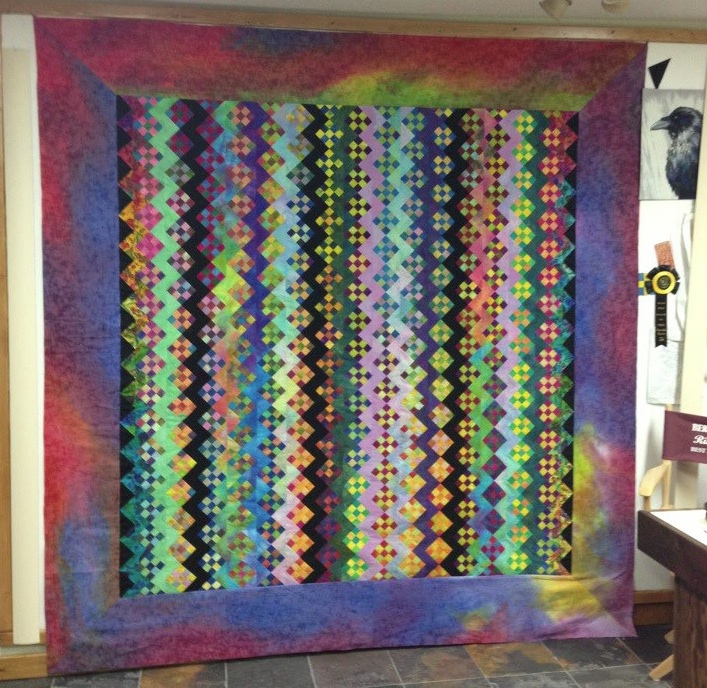
It happened yesterday! I finished the quilt top for my Streak of Lightning quilt. I will admit this is the most ornery quilt I've ever made and mostly because it was made by using very traditional techniques. Quilts like this with a kazillion small pieces means that the margin for error is nonexistent. The slightest changes in seam allowance will throw things off. Actually, I was VERY careful to make sure I was as accurate and consistent as possible to avoid problems. Let me tell you what I learned.
All of the columns were okay and not that difficult. It was important to mark where the columns should meet so that the ziz zag remained the same width. I did one column where I just pinned the top and bottom and a couple of places in between thinking it would just 'fit' -which it did. But that seam had to be picked out because the points of the blocks would shift and fall in odd places messing up the ziz zag - and it was visually obvious.
Notice the triangles pieced on the left and right of the body of the quilt. Those were cut the exact same size and the triangles that were cut to put onto the nine-patches. However, after piecing those, they were at least an inch (maybe slightly more) longer than any of the other columns. Still, I 'eased' them onto the quilt. At that point things were NOT looking good. The quilt was NOT flat, waving and rippling horribly. I almost decided to remove them from the quilt totally, but I didn't. So.... what did I do?
I had faith - that's what! I had faith that if I measured my length down several nine-patch columns, took the average (which was only maybe 1/4" difference at any spot) and made my border exactly that length (again easing those pecky triangle strips) that the quilt would go back to flat. It was important that my borders were cut on the length of the grain so that it was strong and stable to support the problem spots. Also, I pinned a LOT. As you know, I'm known for not being a pinner - but I DO pin when it's necessary - and this was necessary. In this case, I found the center of the border and the center of the side and pinned that first. Then I pinned the corners. Then I tugged from center to corner to ease the fullness, and pinned in middle of that. I continued this until I had about 12 pins on each border.
After putting on the left and right borders (which I had already cut the miter corners on), then I measured across the quilt to get the best average. This measurement was pretty much exact across so I used that measurement to make my top and bottom borders. Again, I pinned to make sure everything was positioned correctly. After competing the four miters, the quilt top was FLAT - and FINISHED! Whoo-hoo!
This would not have happened if I had just sewn on a border without measuring, easing, and pinning. But now, I'm confident that it will look good when it's quilted and will be square as well.
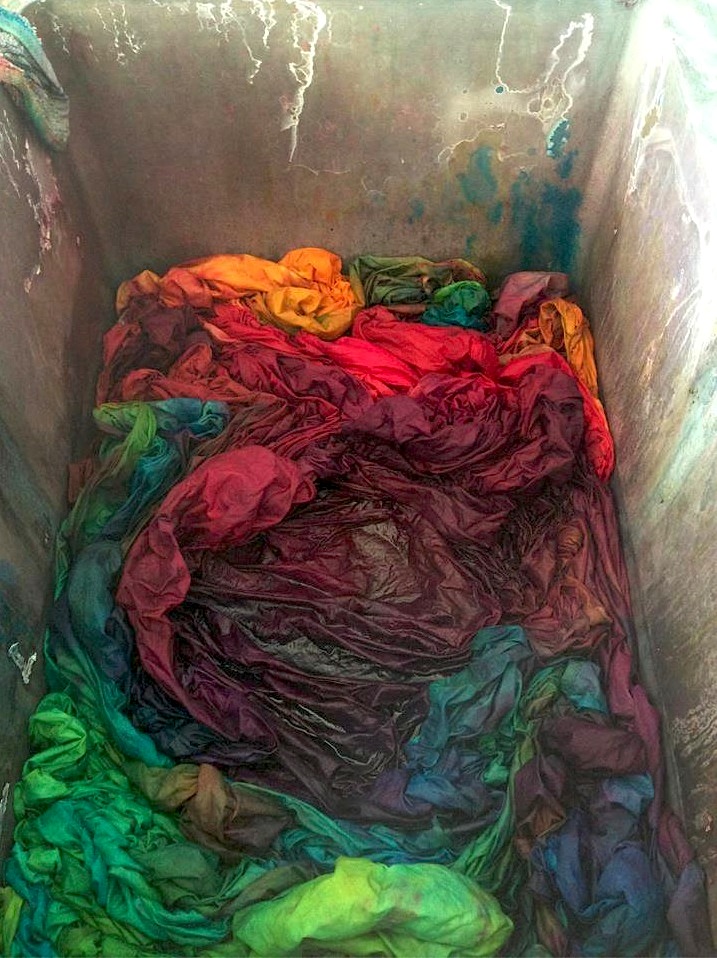
Today I dyed the fabric for the backing - and soon I'll be quilting it.
Have you ever had a project that, after a lot of work, you felt would simply not turn out. Did you toss it aside? Put on your thinking cap? Did if finish better than you expected?
Oh - Since the pattern is a traditional Streak of Lighthing, I was thinking of calling it St. Elmo's Fire (not the movie). St. Elmo's Fire is a weather phenomena created with electrical energy. However, a Facebook friend suggested Northern Lights. That works for me because I have a song on one of my CDs called Northern Lights and I really like using musical terms, phrases, or titles for my quilts. So. Northern Lights is is!


Comments
RSS feed for comments to this post